I realised last night I only had one landspeeder assembled, so I found out my sprues and sighed, but thought why not show the process.
 Land Speeder Sprue
As we can see it looks a fairly simple but alas it is not.
When gluing you have to sit and hold it tightly, but I figure another way.
Whilst I held my last one I leaned it against the table, hard, then I held it in my armpit.. which failed miserably. I finally settled on elastic bands.
Once the landspeeder is together and gluing elastic bands really work wonders.
First I played around with the main bulky parts and quickly remember how to construct the inside and base.
I then glued the base plate to the base of the speeder, and held it tightly to ensure it was a snug fit. For some reason the landspeeder just wants to come apart naturally.
I then glued the base plate to the base of the speeder, and held it tightly to ensure it was a snug fit. For some reason the landspeeder just wants to come apart naturally.
 Dry brushing is where you get a fairly large brush, dip it in the paint but then remove a large amount of it so its almost a dry brush, hence... dry brushing.
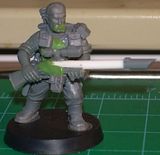
I then clipped my little guy (forgot to clean him up) and glued him together. I thought it was noteworthy that its advisable to paint the guys completely before you put them in the landspeeder. So As I dont want to then wreck him by accident I will be painting the entire model in steps before gluing.


0 comments:
Post a Comment